Sign Git commits
Have you ever wondered why GitHub labels certain commits as [verified]? It's a security mechanism to certify that the author of the commit is the legit person associated with that GitHub account.
Wait, what? I know that your asking: "Is it possible to fake an identity with Git?". The answer is: yes.
With a simple command you can impersonate any other user over GitHub:
git commit -m "Initial commit" \
  --author="Linus Torvalds <torvalds@linux-foundation.org>"
And this is what GitHub shows:

Of course Linus Torvalds didn't collaborate to my project. But this opaque identity handling may potentially be leveraged as a social engineering attack.
To solve this problem, Git added commit signoffs, which are visualized with the [verified] label by GitHub.
Regardless of the good reasons to sign my Git commits, it took a while before I started to do so. As big fan of the automation, here's the Bash script that I've used for a few months to automate the process.
The setup
Note: I use Mac OS X (with Homebrew) as my development operating system, so there may be some differences with Linux or other UNIX flavors.
First you need to install the basic packages:
brew install git gnupg gpg-agent
Now you can set up Git:
git config --global user.name 'Full Name'
git config --global user.email you@somedomain.com
Make sure to replace Full Name and you@somedomain.com with the name and email that you use for GitHub.
Then export the following environment variable into your .bashrc or .zshrc:
export GPG_TTY=$(tty)
The script
The script executes five steps:
1. Git setup
This step sets gpg (from Homebrew gnupg package) as the program to sign commits and tags, enabling signing features globally (for all your repositories).
git config --global gpg.program `which gpg`
git config --global commit.gpgsign true
2. Generate GPG key
This step generates a GPG key (RSA 2048) by using the Git full name and email that you set above. The key will expire in 30 days.
It's a good security measure to rotate often passwords and keys.
cat >.gpgconfig <<EOF
   %echo Generating a basic OpenPGP key
   Key-Type: 1
   Key-Length: 2048
   Subkey-Type: 1
   Subkey-Length: 2048
   Name-Real: `git config --get user.name`
   Name-Email: `git config --get user.email`
   Expire-Date: `date -v +30d "+%Y-%m-%d"`
   %commit
   %echo done
EOF

gpg --batch --gen-key .gpgconfig
rm .gpgconfig
3. Configure the key with Git
This step takes the last generated key and tells Git to use it for signing purposes:
signingkey=$(gpg --list-secret-keys ...)
git config --global user.signingkey $signingkey
4. Restart GPG agent
Next, this step shuts down the gpg-agent.
The next time gpg is used, the agent will be automatically restarted.
This will happen when you'll sign your next commit.
After the restart the agent will be able to read the last generated key.
gpgconf --kill gpg-agent
This is step is needed for convenience purposes. The first time the new key is used, you'll be prompted for the passphrase, and the agent will remember it.
5. Configure GitHub
Signing commits is only the first part of the security equation.
You need to upload your public key on GitHub so their UI will show the Verified green label alongside with each signed commit.
gpg --armor --export `git config --get user.signingkey` | pbcopy
open https://github.com/settings/keys
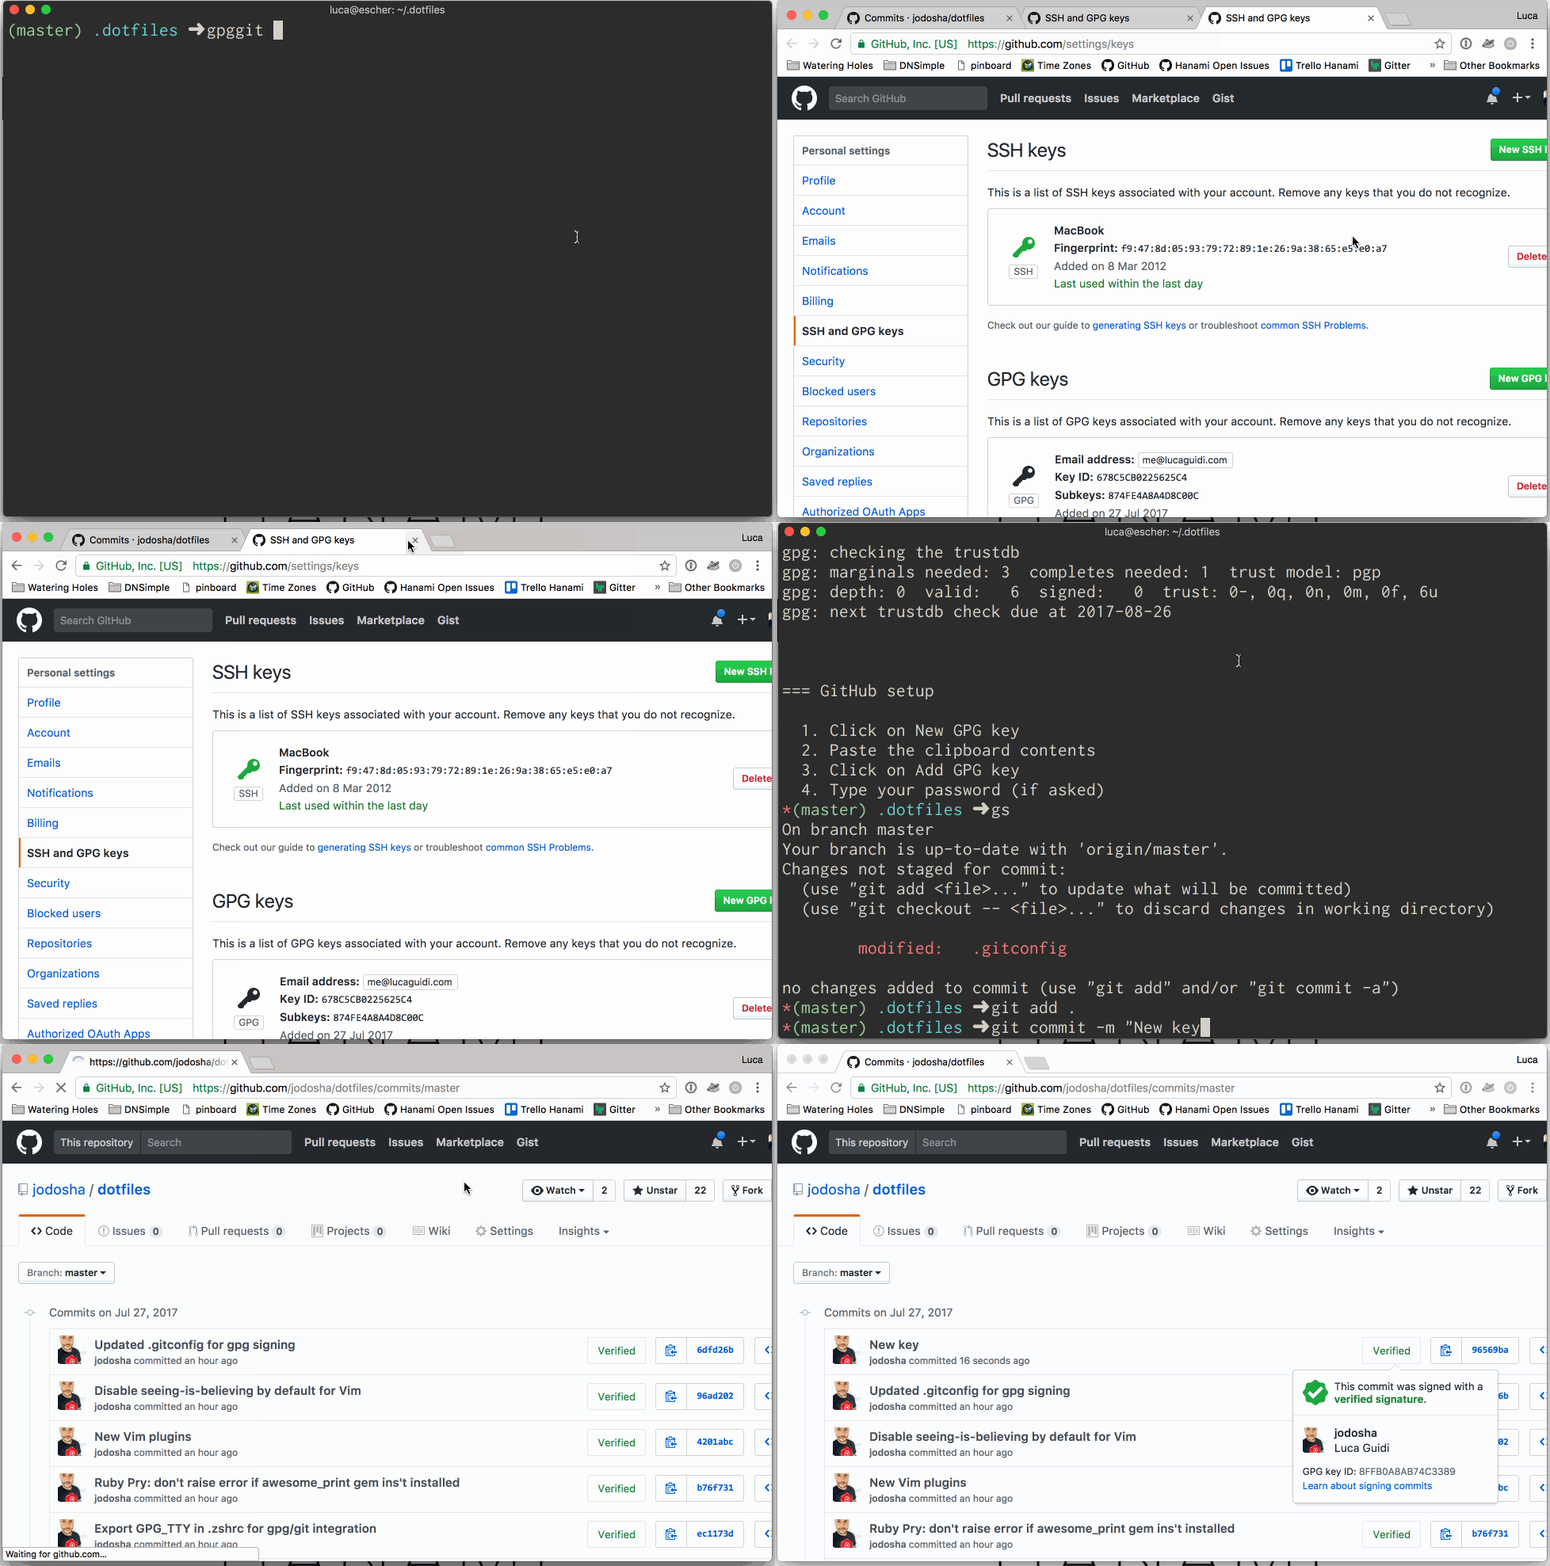
The script will copy the public key in the operating system clipboard. As the last step, it will open a browser with a GitHub page where to paste the public key:
- Click on "New GPG key"
- Paste the clipboard contents
- Click on "Add GPG key"
- Type your password (if asked)
Conclusion
Automation is key to start with good habits. You have no excuse to not sign your Git commit anymore. You can check the source code 📝 of the script, and see it in action here:

📣 UPDATE: Since I wrote this article, Homebrew's package gnupg changed the executable from gpg2 to gpg. I updated the snippets and the script accordingly. Thanks @alxgsv!
Good signing! 👋
Luca Guidi
Former astronaut, soccer player, superhero. All at the age of 10. For some reason now I write code.
We think domain management should be easy.
That's why we continue building DNSimple.

